In the top bar of your project browser pane, press the “Create an entity” button. Select “Driver configuration” from the drop-down menu in the “Type” field, then select your preferred protocol driver from the drop-down menu in the “Driver” field. This will create a Modbus or EtherNet/IP node in your project browser tree. Select the node to access the driver configuration.
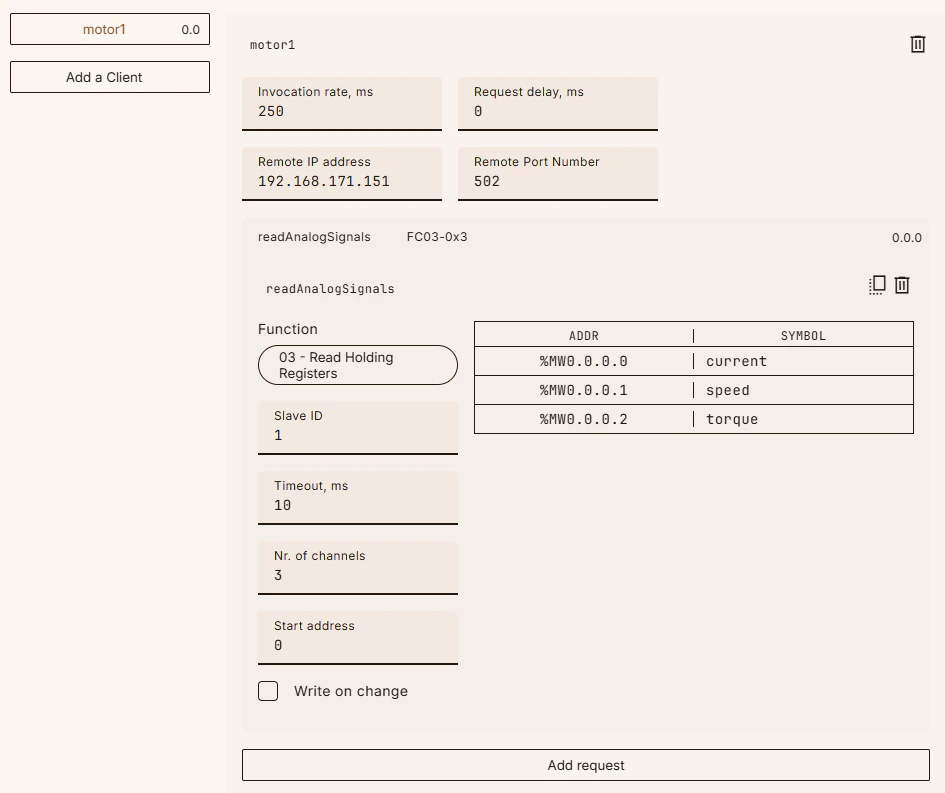
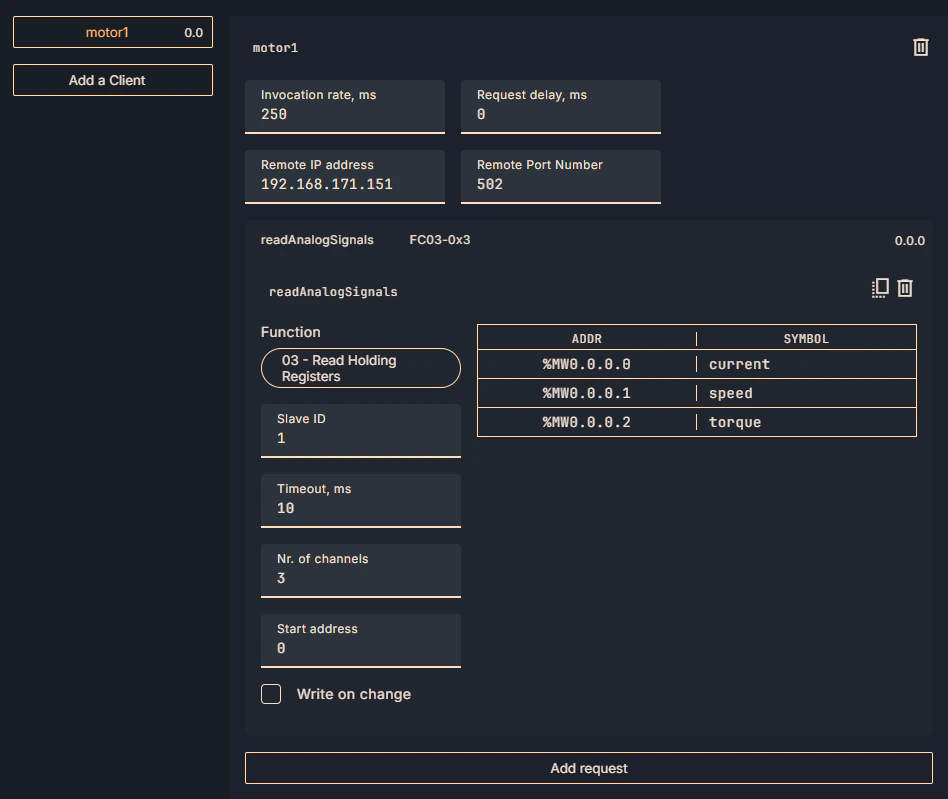
The configuration happens in two steps, where the first one is the client configuration itself, and the second one is the Modbus request configuration. You can create one or multiple clients, and within each client you can create one or multiple requests.As you set up your requests (click on a request header to expand or collapse it), you can map Modbus memory addresses to your own, user-defined symbols via the “Driver symbols” table for better readability and practical re-use throughout your project. In practice, when you assign a Modbus address to tags in your POUs or global variables, you will now be able to select the according symbols instead of working with the rather cryptic memory addresses directly.
The configuration happens in two steps, where the first one is the EtherNet/IP client configuration, and the second is the creation and configuration of Connections. You can create one or multiple clients, and within each client you can create one or multiple connections.As you set up your connections (click on a connection header to expand or collapse it), you can map EIP memory addresses to your own, user-defined symbols via the “Target to Originator (Input) symbols” and “Originator to Target (Output) symbols” table, respectively. This is for better readability and practical re-use throughout your project. When you assign an EIP address to tags in your POUs or global variables, you will now be able to select the according symbols instead of working with the rather cryptic memory addresses directly.